Below shows all the various aspects of the Mysign Digital Signage CMS system and how to use them.
Table of Contents
Logon
You will have been sent an email inviting you to register and set a password for your login, once complete please login at https://www.cloudsignage.me/login where you will then be presented with your Dashboard.
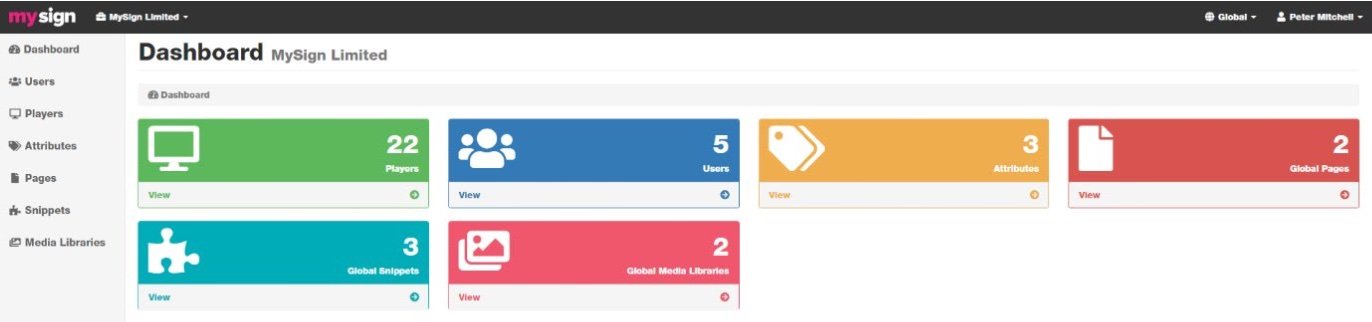
Dashboard
Icons
Players: Select this to view all the players in your system.
Users: This will show you the users and their roles.
Attributes: Assigned to a player as an identifier (advanced)
Global Pages: Pages that can be deployed to one or all players (advanced)
Global Snippets: Snippet that can be deployed to one or all players (advanced)
Global Media Libraries: Media library that can be deployed to one or all players (advanced)
Global Text Libraries: Text library that can be deployed to one or all players (advanced)
Players
Here you can see all the players on your system and check their Status. You can also Preview each player’s content. To edit or add content to the player select the player under the Name tab.
Users
Here you can see all users, email addresses, and their roles. You can add users if your privileges allow.
Attributes
See advanced section
Global Pages
See advanced section
Global Snippets
See advanced section
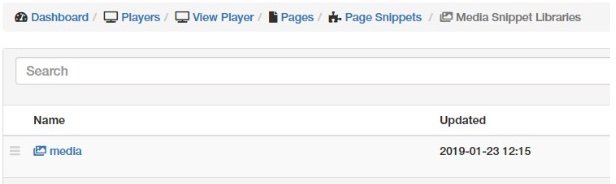
Global Media Libraries
See advanced section
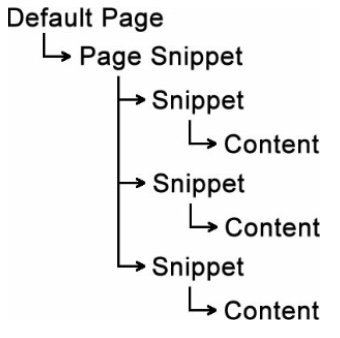
Page Layout Schematic
Creating Content
Go to the Dashboard and select the Players button. Select the player you want to add the content to. Click the Pages icon.
Now select the Default page.
Default Page View.
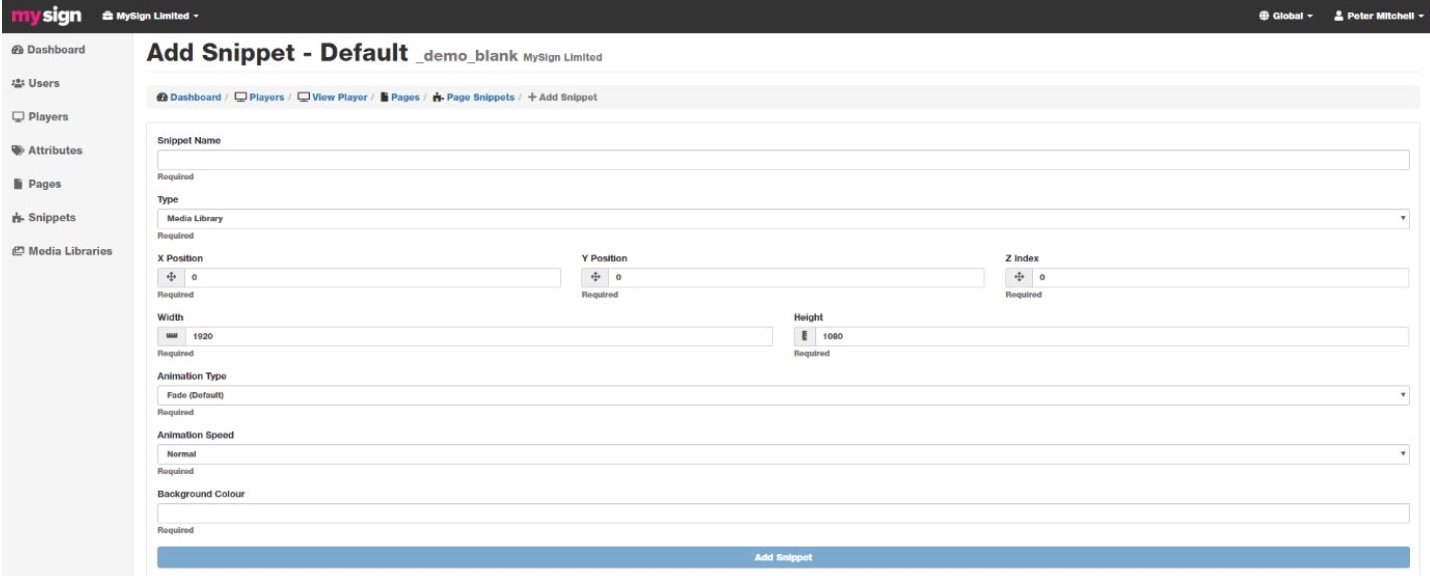
Now select Add Snippet and choose Create New
You can choose from one of the following Snippet Type:
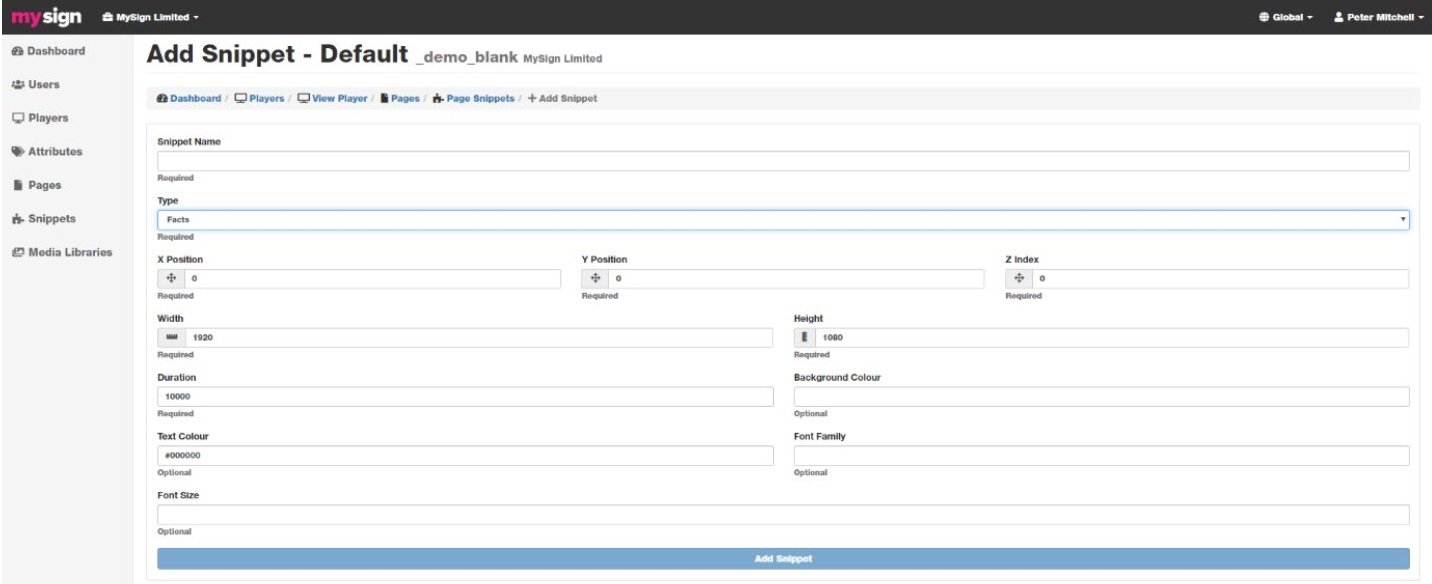
Add Snippet
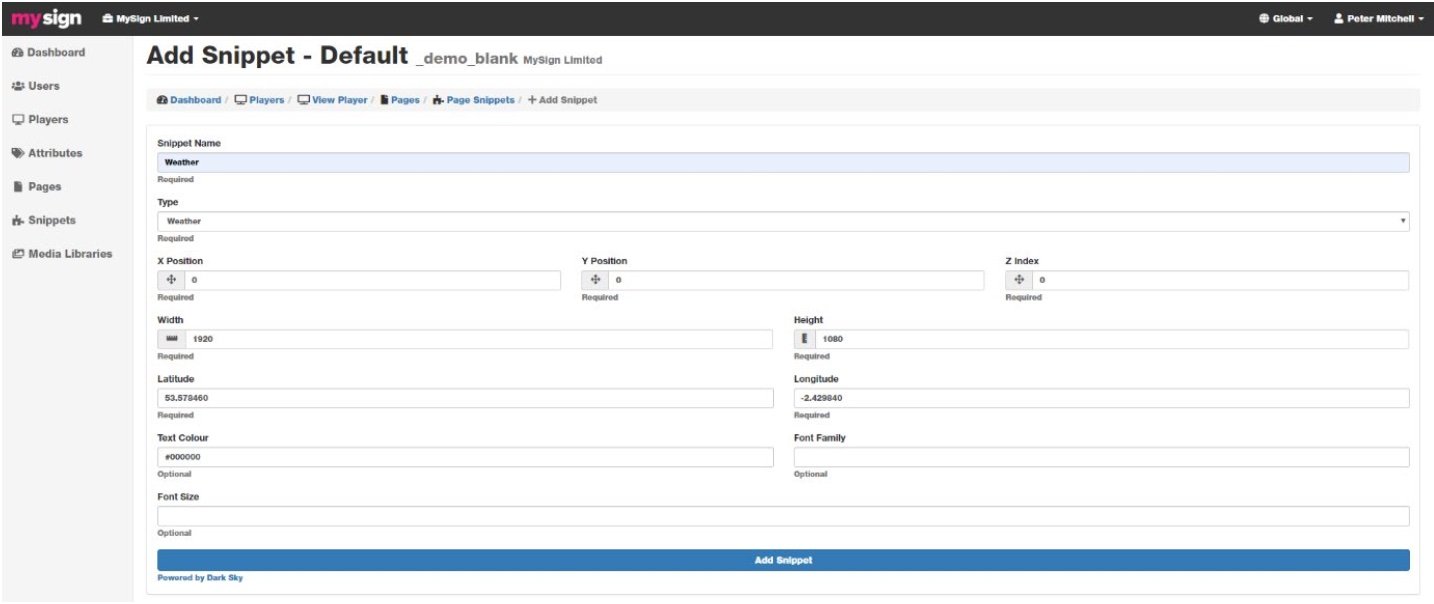
For ALL snippets you will need to give a Snippet Name, set the Type, set the X and Y position, and set the Width and Height. Dependant on the snippet you will have to set other parameters that will be shown below. Once done select Add Snippet.
Snippet Types
Date: Date with many options and styles. Facts: Hundreds of facts in the database. Forecast: 5 Day Weather forecast. HTML: Custom HTML content (please contact support for more details). Media library: General media library for images and videos. On This Day: Memorable events for today and the next 3 days to cover weekends. Picture in Picture (HDMI In): Can only be used with our Android PIP player. Questions & Answers: WIP. Questions & Answers: Similar to the Facts snippet but in a Q&A format. RSS Feed: Text scroller using a standard XML feed. Text Message: Simple text messages. Time (Analogue): Analogue clock that can be styled and sized to suit. Time (Digital): Digital clock that can be styled and sized to suit. Weather: Weather can be set to any location in the world. Text Library: Text version of a Media Library where local and global libraries can be set. Google Calendar: Integrate all your Google Calendar events onto your screen.
Date
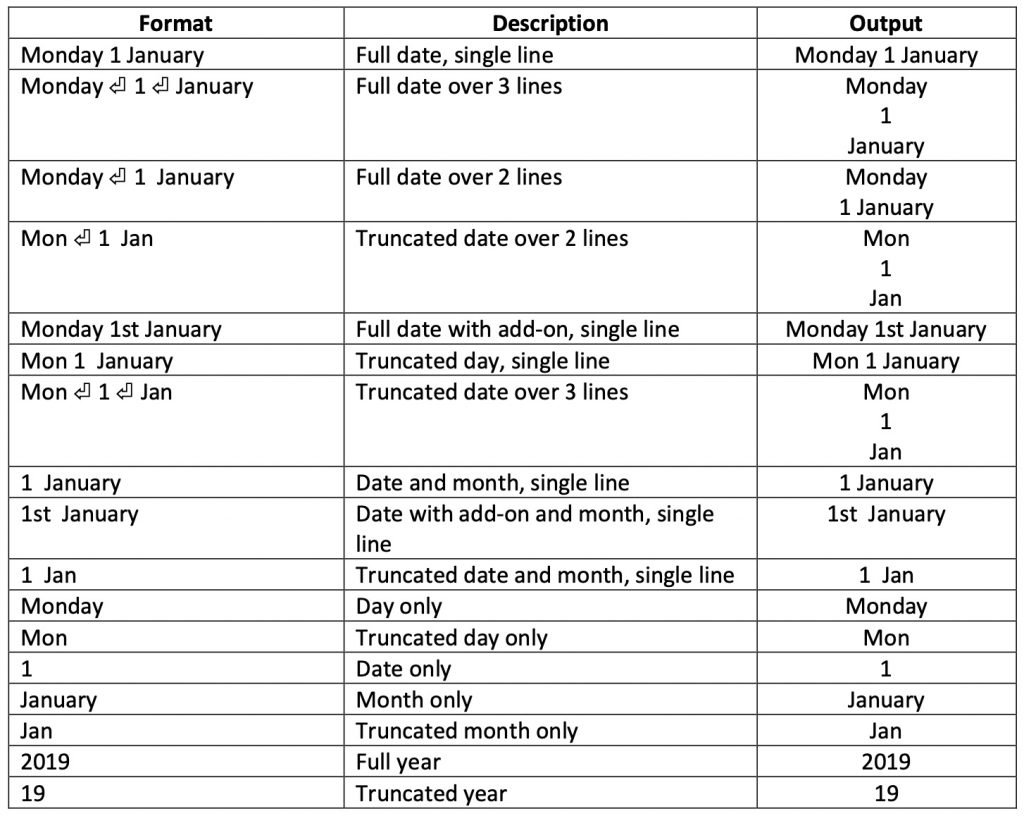
Enter the X and Y dimensions, and Width and Height. Select the format from the various options which are shown below. Select the size, i.e. 26pt.
The many options allow you to customise the look on your screen.
Facts
Hundreds of QI type facts in the database will keep the screens looking fresh with regular new content. Enter the X and Y dimensions, and Width and Height. Set the font size to suit. We recommend a font size of 32pt as a good size. You can also change the default duration and text colour along with the background colour. Remember, colours need to be either web safe named or use the HEX code, for example White text is #FFFFFF and Black text is #000000.
Forecast
Enter the X and Y dimensions, and Width and Height. The weather forecast is vector based so you can make it any size you like without losing any quality. The size of the weather snippet is set by entering a figure in the Font Size area, but you can leave this blank for the default setting to be applied. Leaving this blank sets an area of 500px wide by 200px high. Changing the font size requires you to adjust the Width and Height to suit.
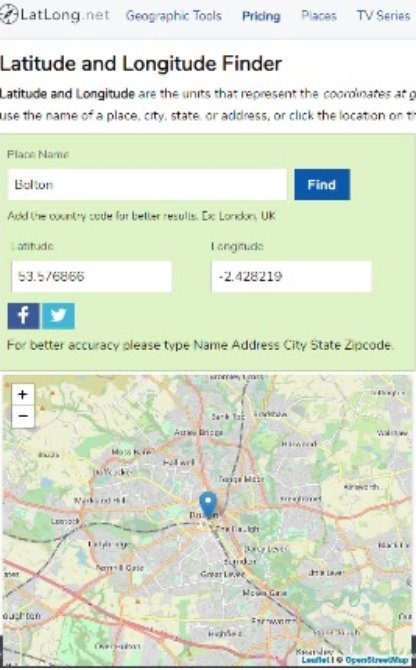
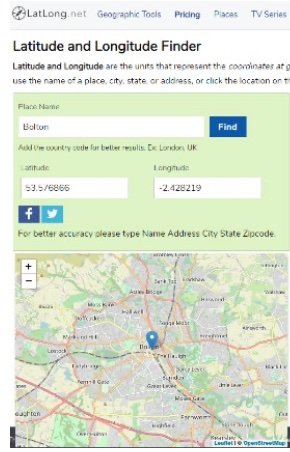
To set your location you will need the Latitude and Longitude figures for your area. You can get these from https://www.latlong.net/. Enter your town then copy and paste the figures given into the snippet. Any problems then please contact support, and we will assist you in setting this up.
You can also change the default Text Colour, Low Temperature Colour, and High Temperature Colour. Remember, colours need to be either web safe named or use the HEX code, for example White text is #FFFFFF and Black text is #000000.
Custom HTML
This snippet allows for custom HTML code to be added, as this is an advanced feature please contact MYSIGN for more details.
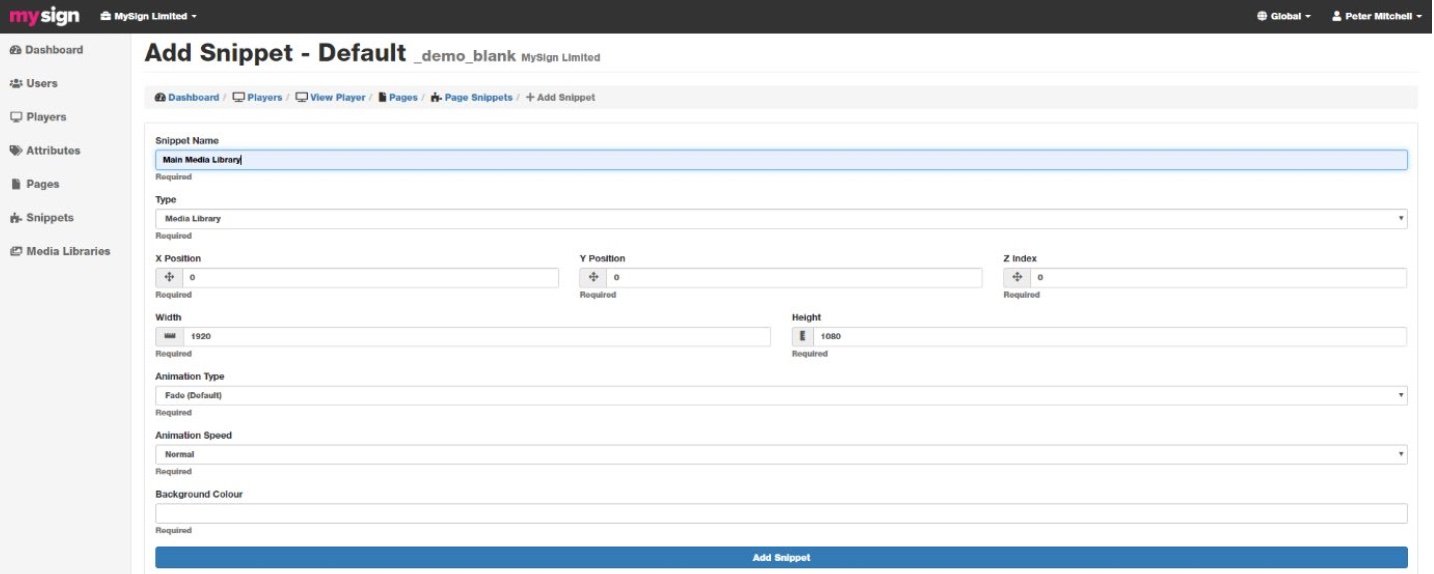
Media Library and Templates
Set the X and Y position to 0 and 0 for a full screen image or something else if you want it to appear in front of and in addition to another media library. Set the Width and Height to match the display the player is connected to (this is normally 1920px x 1080px for full screen landscape and 1080px by 1920px for full screen portrait), or set a different resolution if you are placing the media library within a template. Keep Animation Type and Animation Speed as they are (you can change these later). Select Add Snippet when you are happy with the snippet settings.
Navigate back to the Page Snippets tab using the breadcrumb.
Now select the snippet you just created.
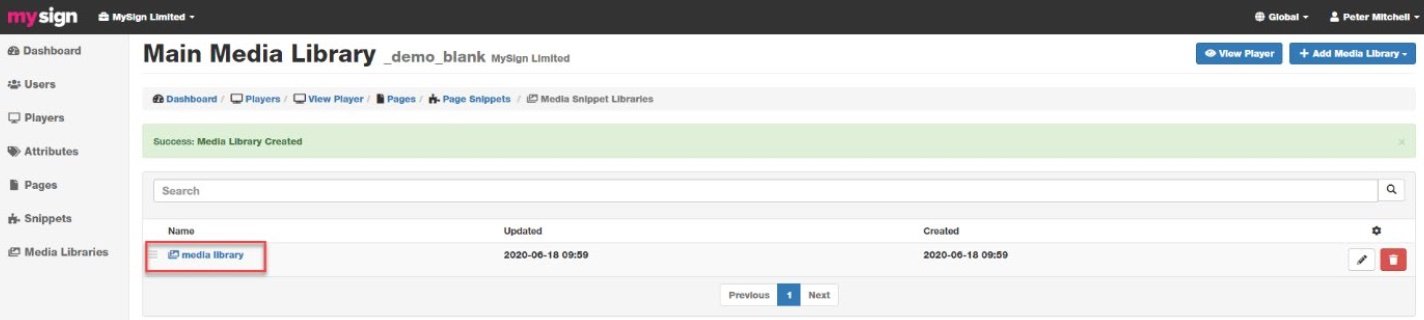
Now click the Add Media Library button and select Create New
Give the new media library a name and then click Add Media Library.
Select the new media library.
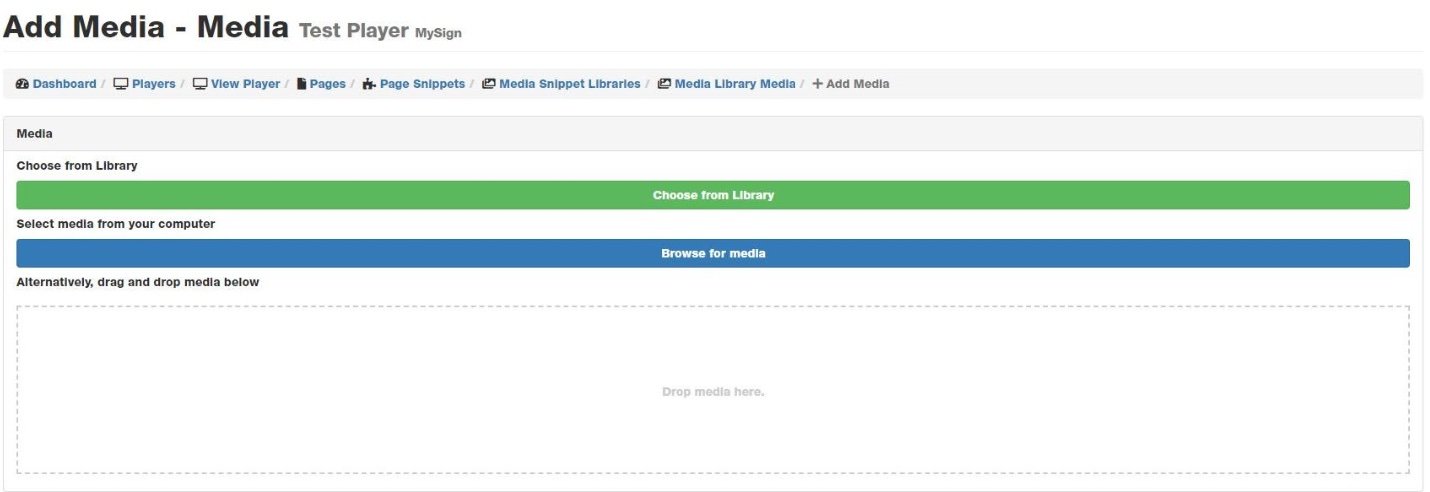
Now click the Add Media button.
You can now choose to use one of the Mysign Template Images, upload your own images manually through the Browse for Media button, or drag and drop files from your computer into the Drop Media Here box. Make sure the images are the correct size for the media library selected. For images, we recommend jpeg, png, or gif format. For videos, we recommend webm and mp4(please make sure videos are at the correct resolution and bitrate. Any queries then please contact support.
Once your files have uploaded you will be redirected to the Media Library.
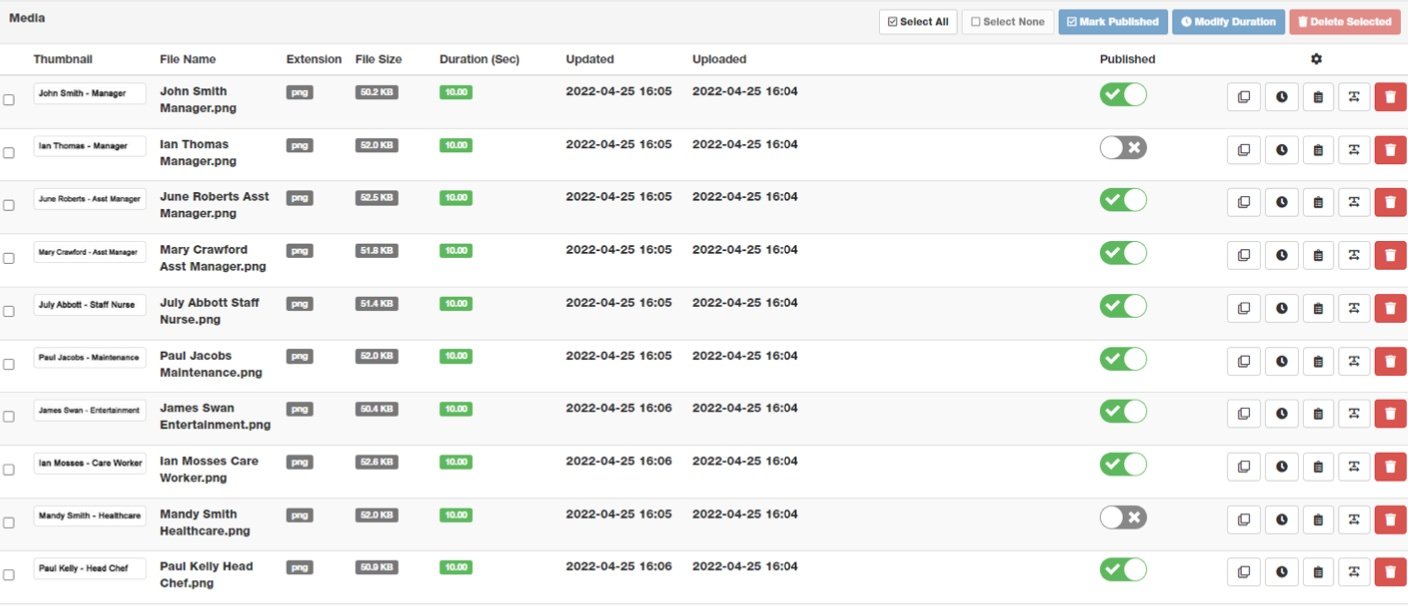
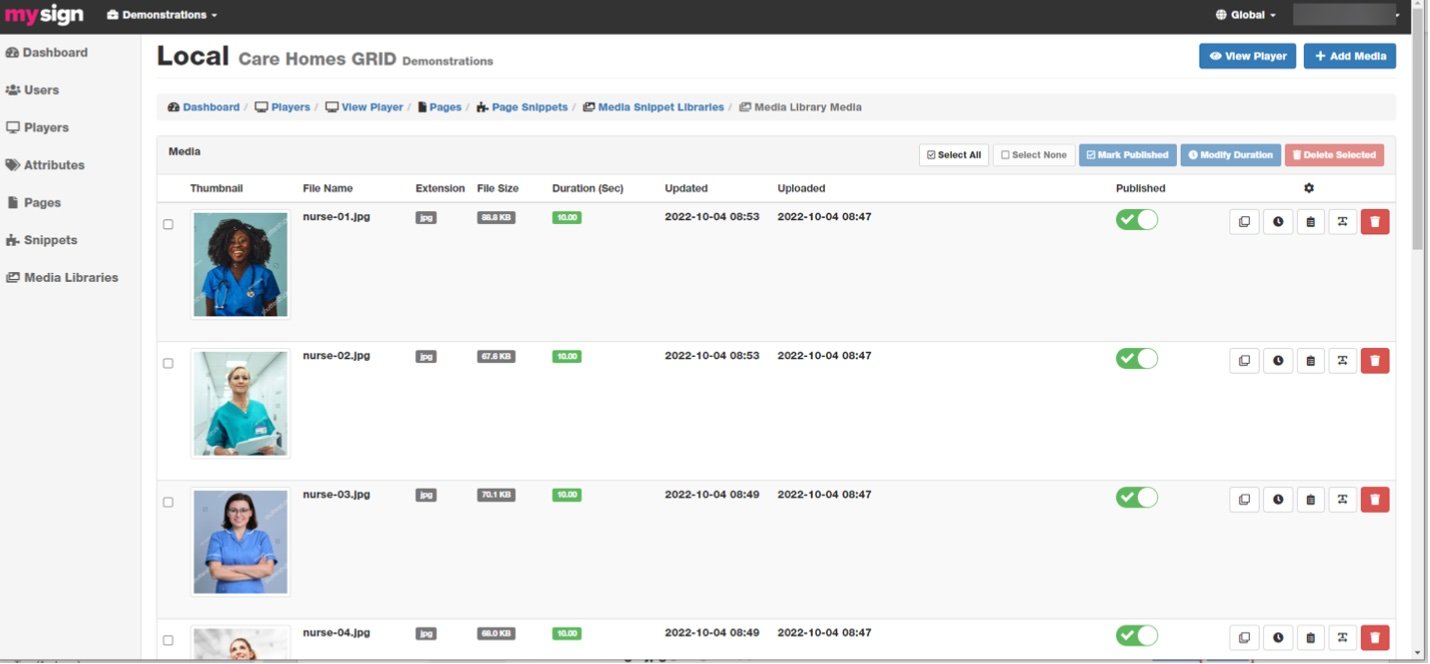
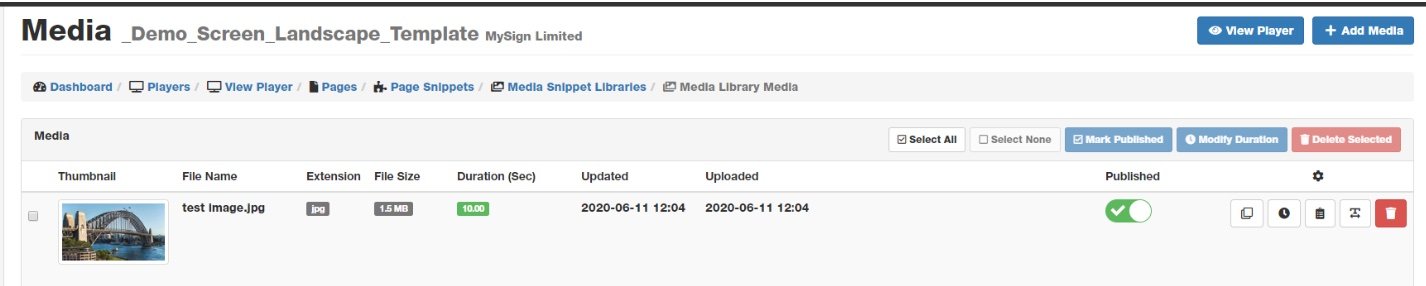
By default, the media is disabled. To show it indefinitely, click the Published button. You can schedule when the media is displayed. Go to Rules (Advanced) for more information.
Setting Slide Duration
You can adjust the amount of time media is displayed before transitioning to the next item. This can be seen by selecting a Media Library and then looking at the Duration (Seconds) column which will show the current amount of time each Image will be shown for.
To edit the duration of an Image, click on the Time icon next to the piece of media.
You can also use the Tick Box on the left-hand side to select multiple pieces of media and then click Modify Duration, or click the Select All button followed by Modify Duration to change the length of time for ALL image.
Remember to make sure you have Published your images or else they will not appear. From here you can click the View Player button to see what the screen will look like.
Animation Type
If you have multiple images in your media library, you can choose from a selection of animation types to transition between. When creating or editing your media library, click on the dropdown under Animation Type to see your options. Below are examples of how each animation type transitions.
Display ALL
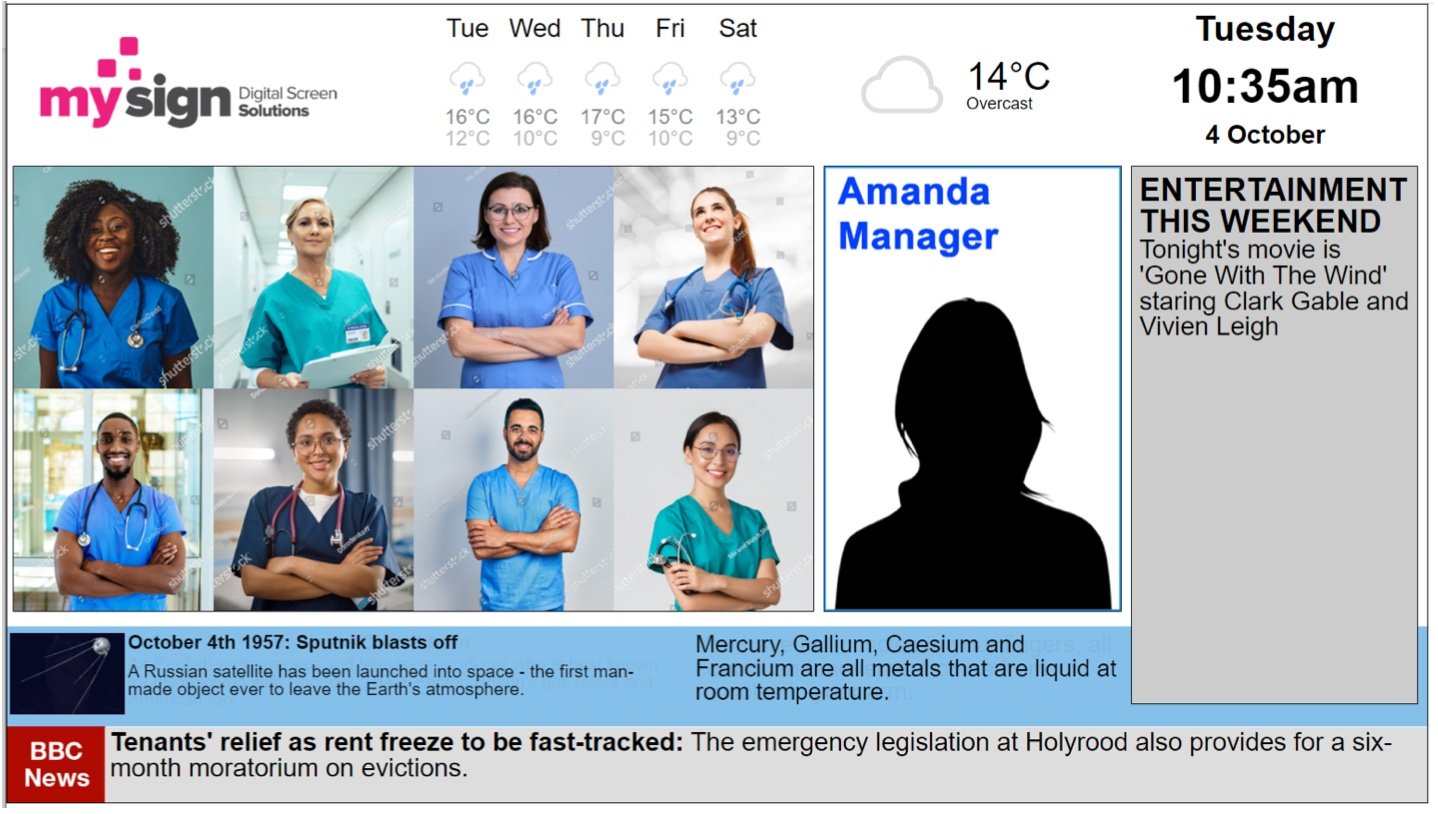
The last option is ‘Display All’, this is a special feature allowing you to show ALL the images in the media library at the same time, below is an example how this could be used.
The last option is ‘Display All’, this is a special feature allowing you to show ALL the images in the media library at the same time, below is an example how this could be used.
The images created are 400 pixels wide by 50 pixels high.
Below shows the result on the screen with the images published being seen and the images un- published being hidden, images can be switched on/off or scheduled via rules.
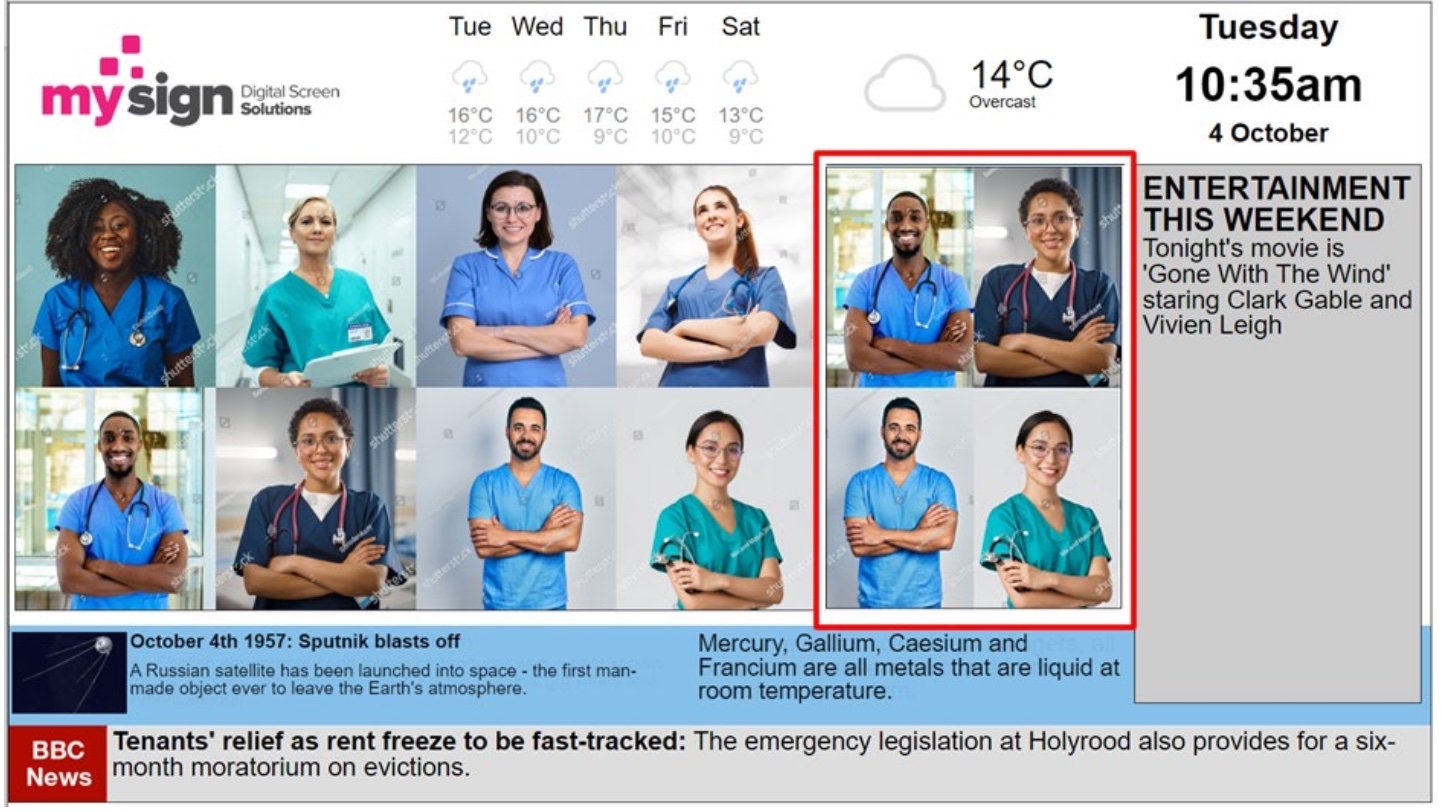
Display Grid
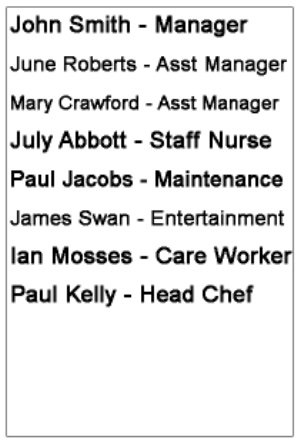
This feature will create slides from multiple images and then create a slideshow from the slides, in the demo we will use a care home scenario where staff photos can be selected to create each slide.
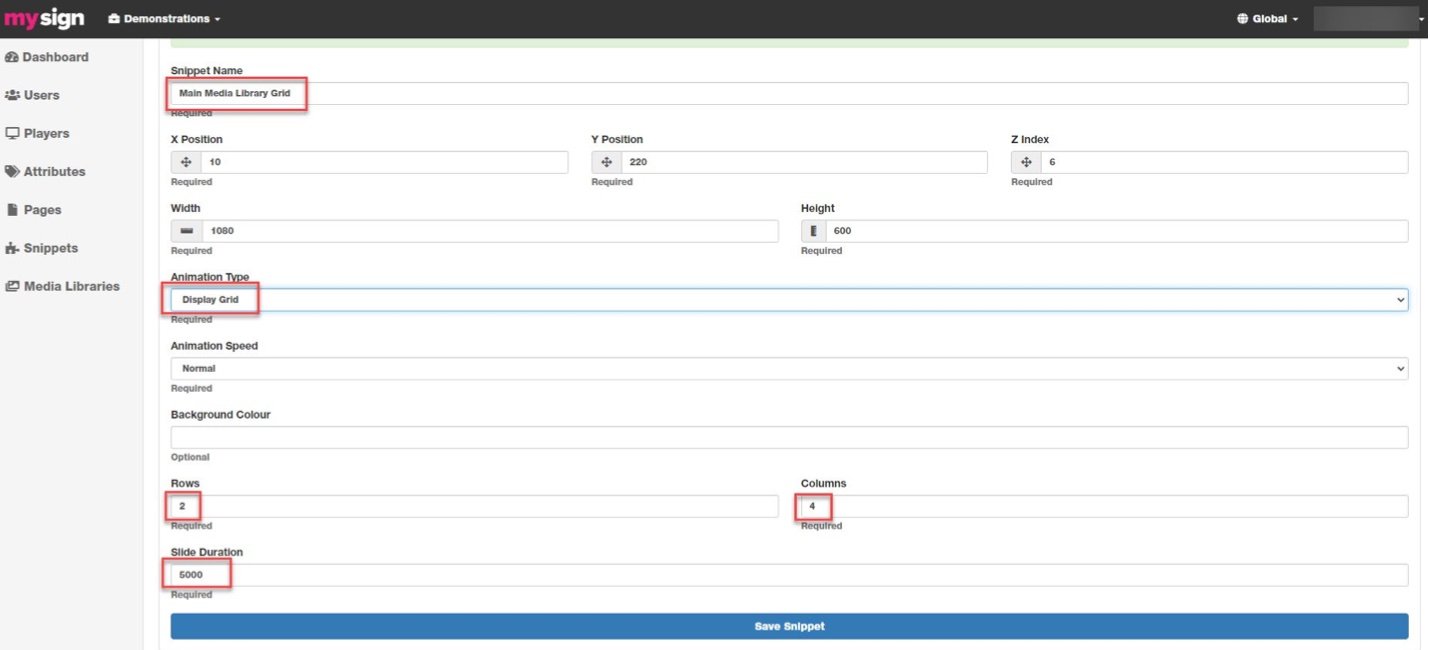
SETUP Create a media library as shown below selecting ‘Display Grid’ as the animation type, Rows to 2, Columns to 4 and Slide Duration to 5000 (5 seconds).
As the overall size of the media library is 1080 pixels by 600 pixels and we have selected a 2 x 4 grid then each individual image needs to be 270 pixels by 300 pixels (1080 ÷ 4 and 600 ÷ 2).
Now create a media library in this snippet. Add the images to the media library.
Images can now be ‘Published’ individually or scheduled using ‘Rules’, result will look as follows with the first 8 images showing on the first slide and the next 8 images showing on the next slide, images can be moved up or down to change their position.
If you want to create a grid for the secondary media library then create images at 200 pixels by 300 pixels and select a 2 by 2 grid
Rules & Attributes
Rules and Attributes are immensely powerful tools. In order to help understand these tools we must first know what they are.
Rule: A rule can be applied to a single image in an image library or a full snippet. The rule dictates when the image or snippet is shown. This can be done through multiple methods: Date & Time Range: Set a date and time to start and a date and time to finish. Daily: Set a start and finish time on selectable days of the week. Player Attributes: Show an image only on players with a selectable attribute assigned. You can choose to display content if ANY or ALL these rules apply. Combining rules allows you to create complex requirements for content to be displayed.
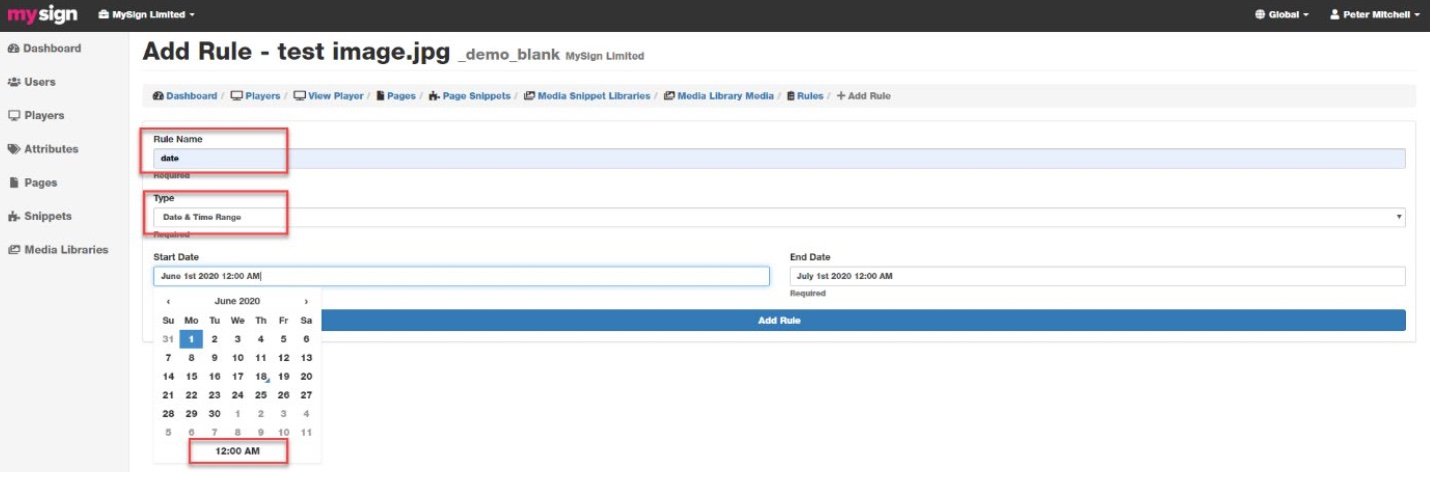
Date & Time Rule
Navigate to the Media Library Media page and select the Rule icon on the right-hand side of the image you wish to apply the rule to.
Now click Add Rule. By default Show media if ANY of the rules below apply is selected.
Give your rule a name that is relevant and easily identifiable. Below shows a simple Date & Time Range for a start and finish schedule.
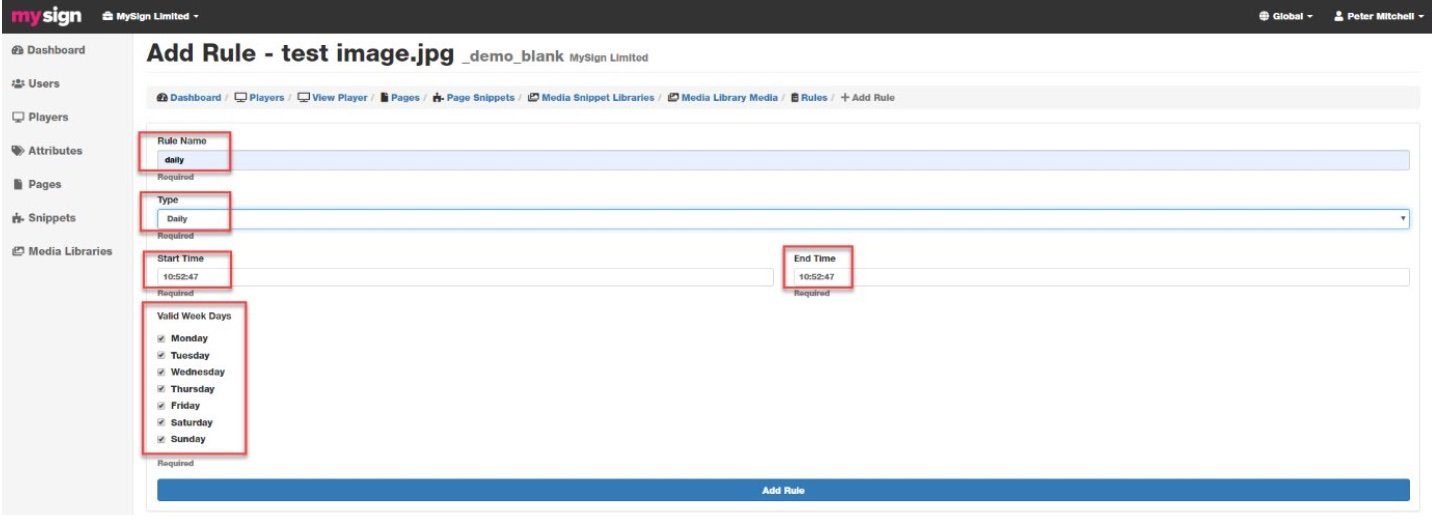
Daily Rule
Below shows a rule for showing content on a selective Daily basis with a start and finish time for each selected day.
In this example we have changed to Show media if ALL the rules below apply.
For the image to show we need BOTH rules to be valid, i.e., date & time range from June 1st 2020 to June 30th 2020 AND daily MTWTF, so every day from 8am to 5pm except Saturday and Sunday.
If any images have rules applied to them then the rules icon will be blue. You can create rules for whole media libraries as well as for individual images. Click the rules icon next to the library and create rules as shown above.
If any media libraries have rules applied to them then the rules icon will be blue.
Attributes Rule
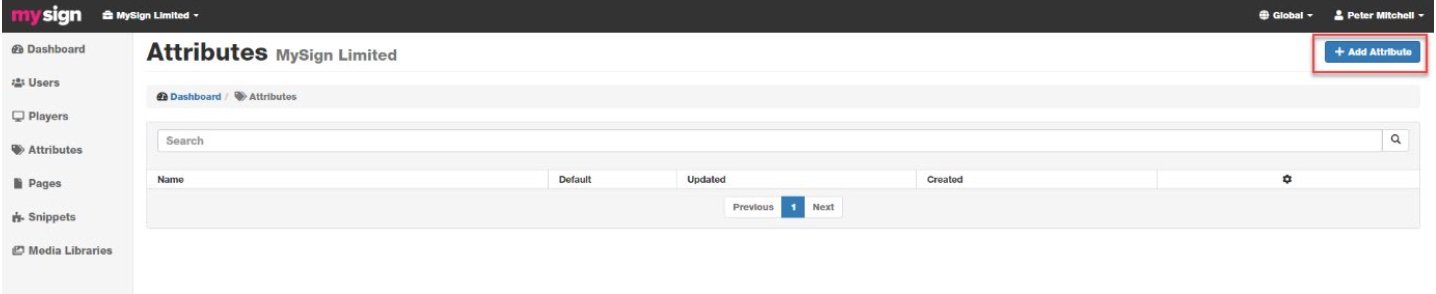
Go to the Dashboard and click Attributes. Then select Add Attribute.
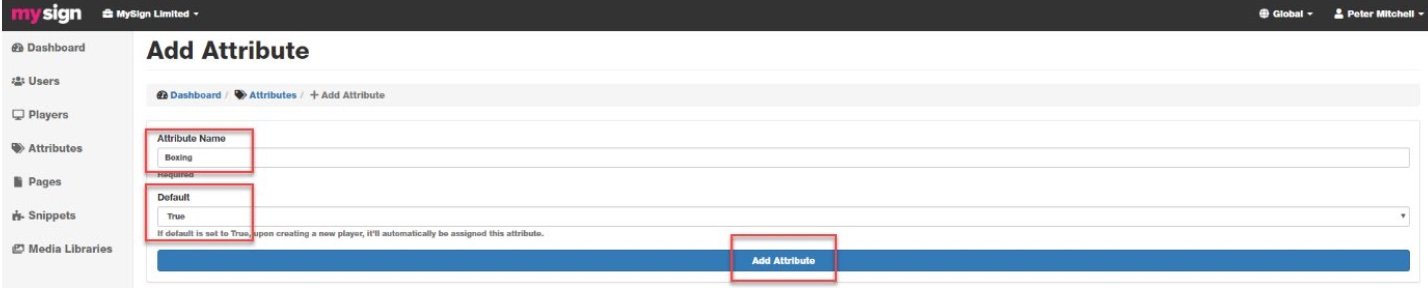
Give the attribute an appropriate and identifiable name. If you want the attribute to be automatically applied to all future players created set Default to True, otherwise set it to False. Finally select Add Attribute.
We now have an Attribute called Boxing.
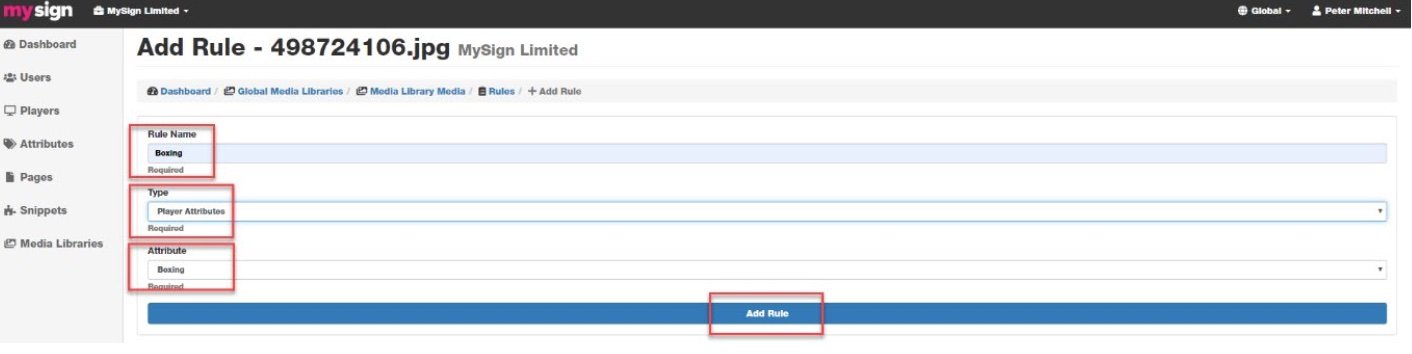
Attributes work with Global Media Libraries. Select an image in a global media library, add a rule, and give the rule a name. Select Type to Player Attribute, in the attribute field you will see Boxing. If you have several attributes created, then you will have a drop down menu to choose from. Finally add the rule.
Go to the Dashboard and click Attributes. Now select Boxing.
You can now select Players then select Add Player.
On the Add Player screen you will see all your players. Click the check box next to the players you want to have the attribute and click the Add Selected box. Only players you have selected will show that image.
Using Templates
You can use the Text Snippet function on your own images or else select an image from the Mysign Template Library. Click on the media library you want to add content to, in this example we will add to the ‘Main Image library’, now you will see the media library.
Click on ‘Media’ and you will see the images in the library.
Now click the Add Media Button
You now have the option to select an image from the Mysign Media Library or else select an image you have created on your computer, if you are using your own image then upload them manually through the Browse for Media button or drag and drop into the Drop media here box, please make sure the images are the correct size for the media library selected. For images we recommend jpeg, png and gif format, and for videos we recommend webm and mp4(please make sure videos are at the correct resolution and bitrate, any queries then please contact support.
MySign Templates
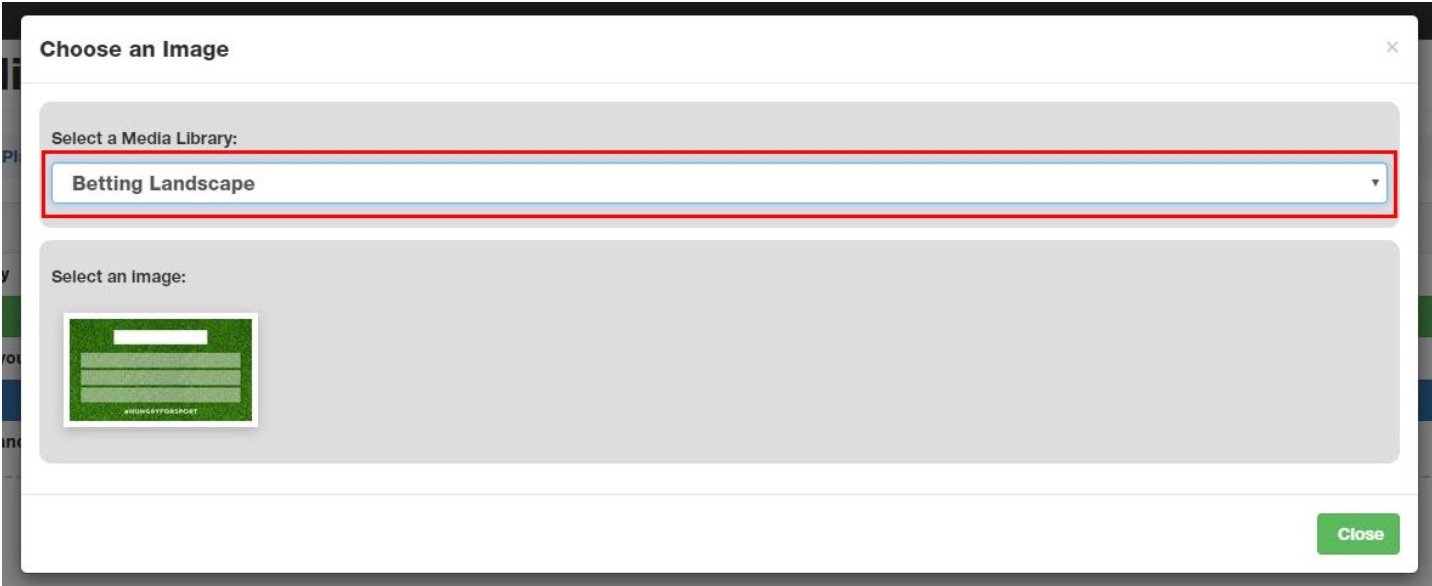
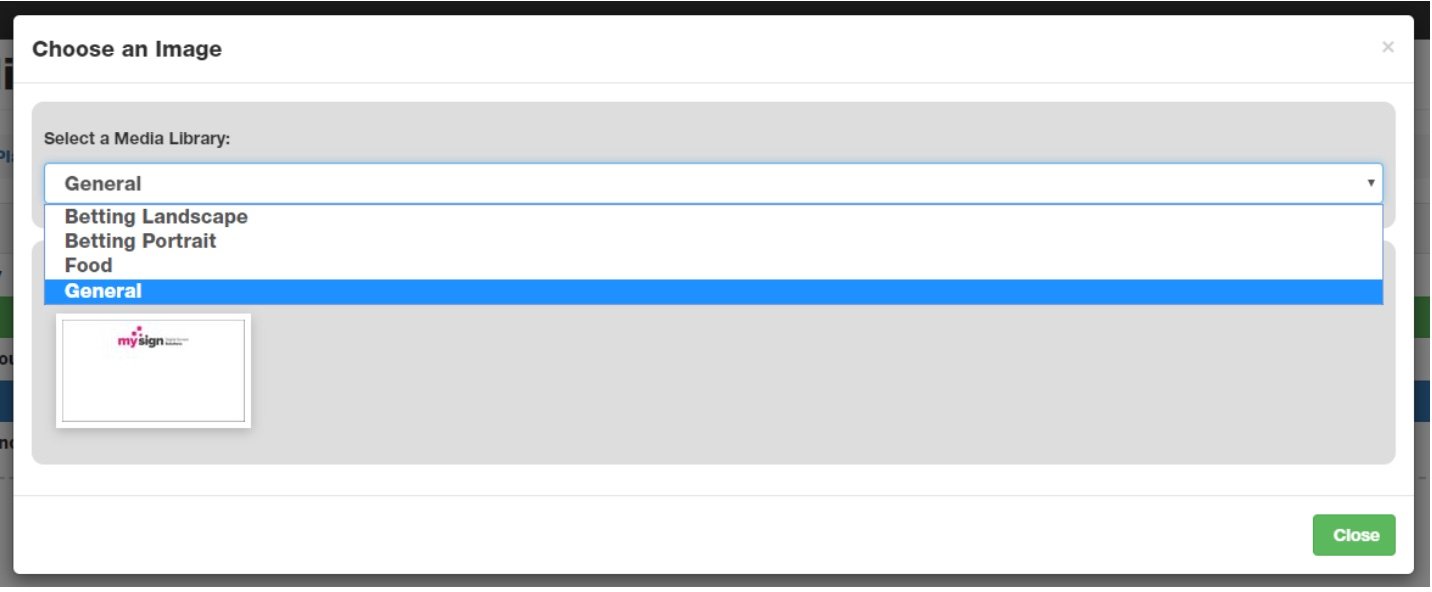
If you want to use one of the Mysign Media Library images then when you select that you will see the option to Select a Media Library.
Use the drop down menu to select a media library, once selected you will see all the images available, select the one you want to use..
Once selected you will be taken back to the media library, please note that by default the image will NOT be published so will NOT show up, once you have added your text and any scheduling rules then you can publish the image,
Adding Text
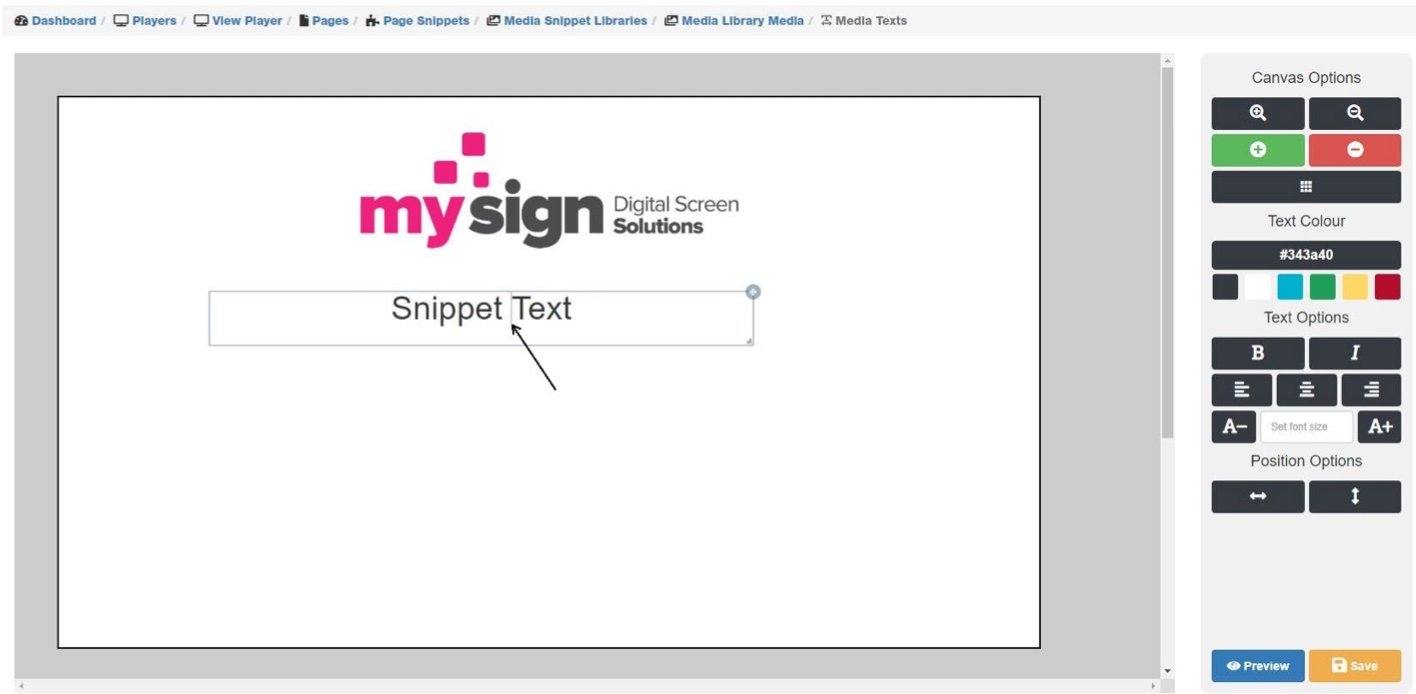
Whether you add an image from the Mysign Media Library, or your own image, you will see an icon on the right hand side that allows you to add text. Once you select the Text Snippet for an image you will be taken to the editor.
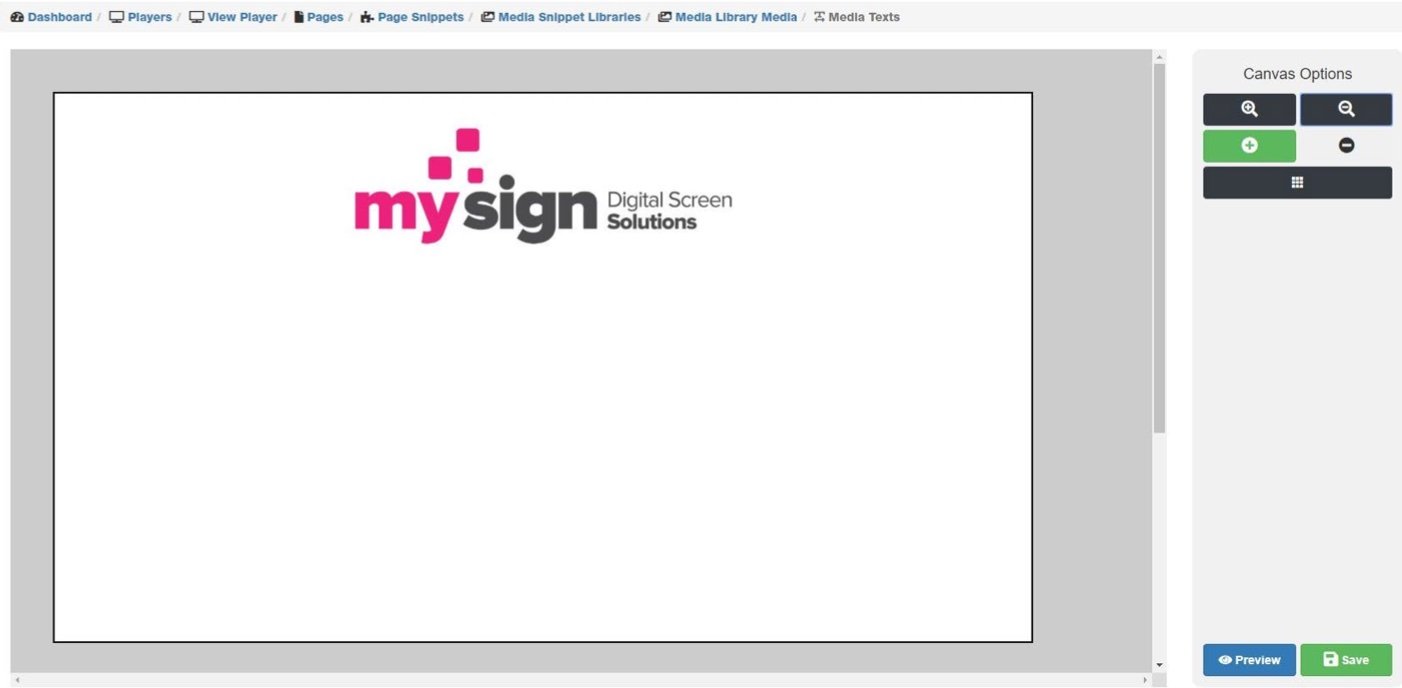
Use the Zoom In and Zoom Out to adjust the image size for viewing and editing along with the scroll bars on the edit window.
Select the Add Text Box and a text box will appear at the top left of the screen.
There are 2 handles on the text box, use Drag to move the text box within the image and Resize to stretch the text box both horizontally and vertically as shown here. You can now edit the text using the simple text editor.
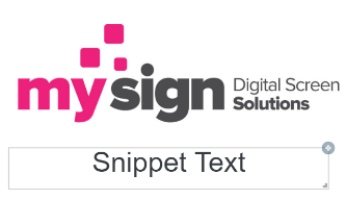
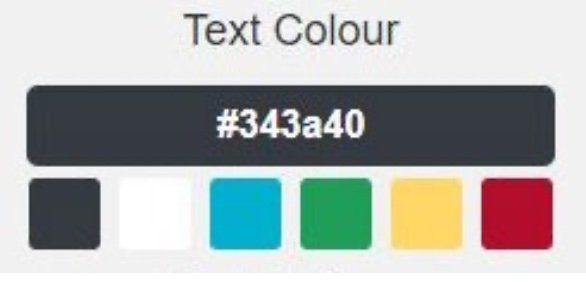
You can select from the colours shown or else click in the HTML colour code (#343a40) and add your own colour code (Hex), for a complete list go to: https://html-color-codes.info/
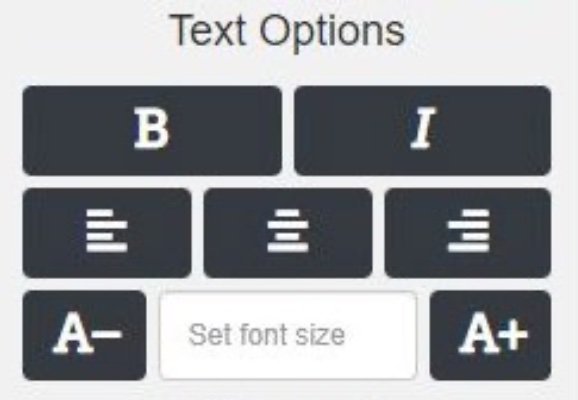
Here you can select from Bold and Italic text, adjust the justification from Left, Centre and Right and increase and decrease the font using the buttons or else enter the font size of your choice.
You can justify the whole text box to centre vertical and horizontal using these 2 buttons.
Once you are happy with the text added you can click the save button ,once saved it will go green to confirm.
At any time you can select the preview button to see how things will look. You can add as many text boxes as you like and as much text as you like, remember to always save before leaving the editor. To leave the editor simple click the ‘Media Library Media’ on the breadcrumb.
You will see that the Text Snippet icon has now turned blue to show that text has been added to that image, you can now add any rules that you require or simple publish the image for it to show. If you want to edit the text then simple click on the Text Snippet icon and it will take you into the text editor.
Deletion
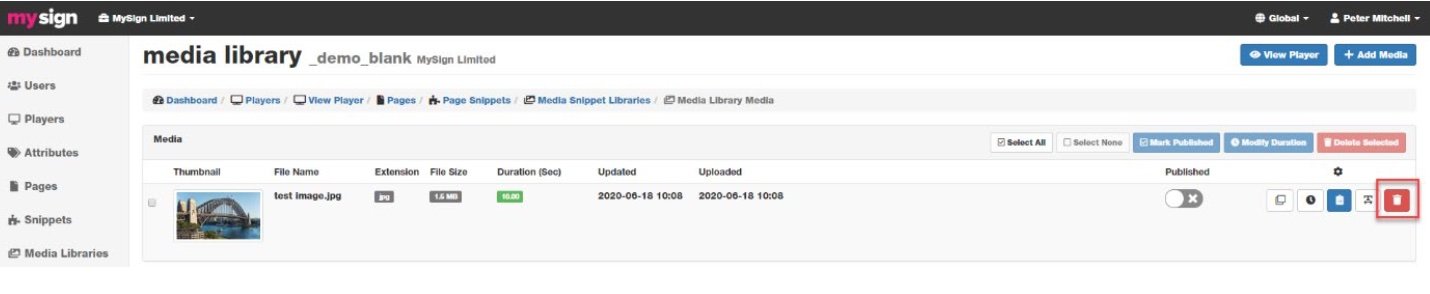
To delete a single image, select the media library and click the Delete button.
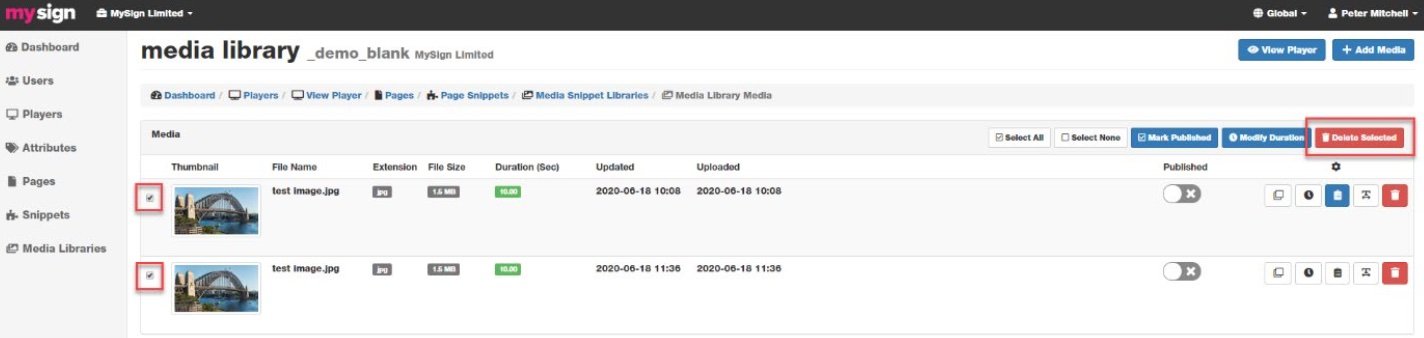
To delete several images select the tick box on the left of each image then click Delete Selected.
To delete ALL images, click the Select All button then click Delete Selected.
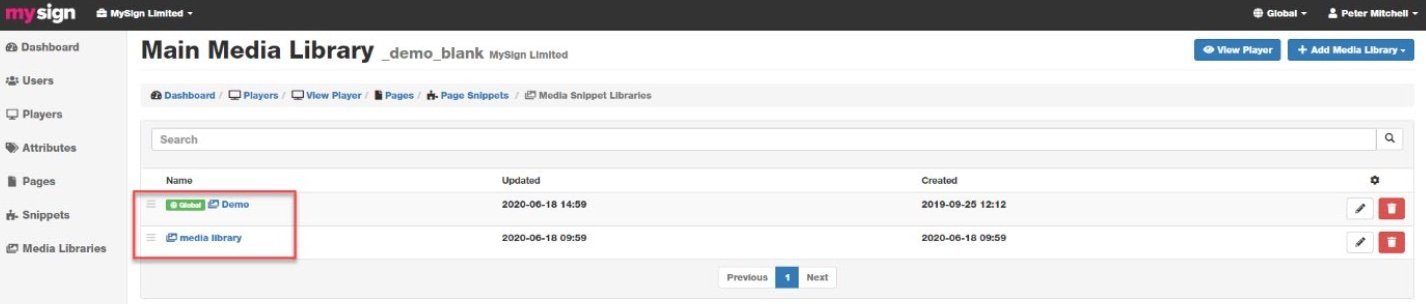
To remove a media library, go to the Media Snippet Libraries and click the Delete icon next to the library you want to delete.
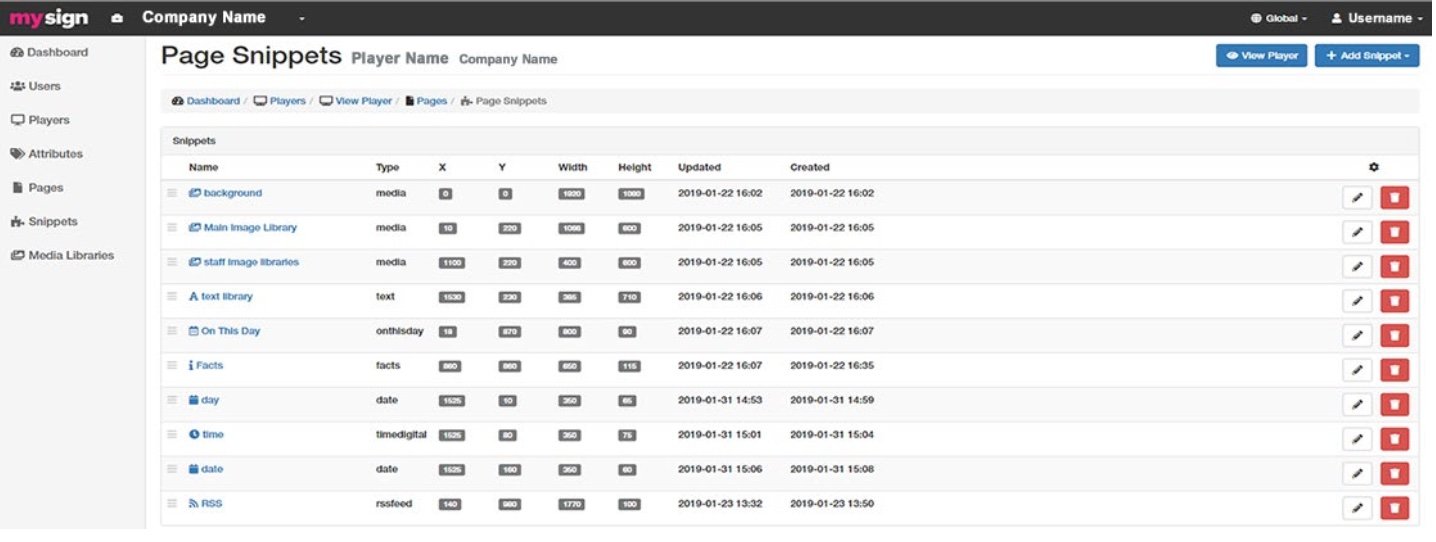
To remove a snippet, click on the Page Snippets and click the Delete icon next to the snippet you want to delete.
On This Day
Set the X and Y position and set a Width of 900 and Height of 110. You can change the background colour and you can change the duration from the default of 10 seconds.
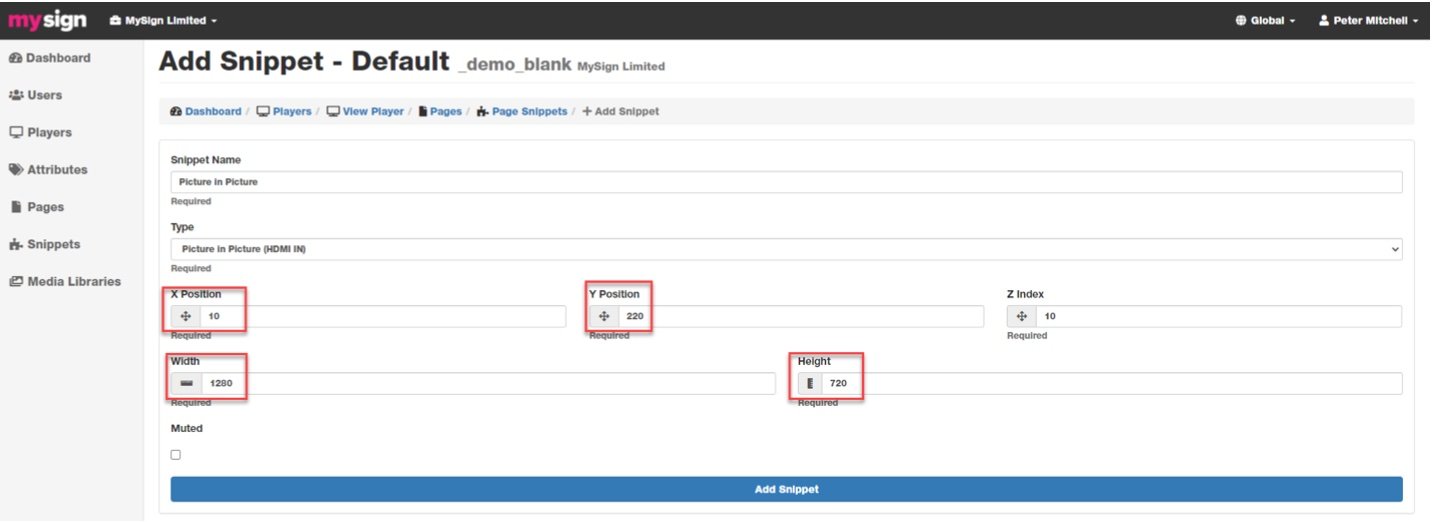
Picture in Picture (HDMI in)
This can only be used with our Android PIP player. Set the X and Y position and set the Width and Height. Dimensions must be 16:9 ratio.
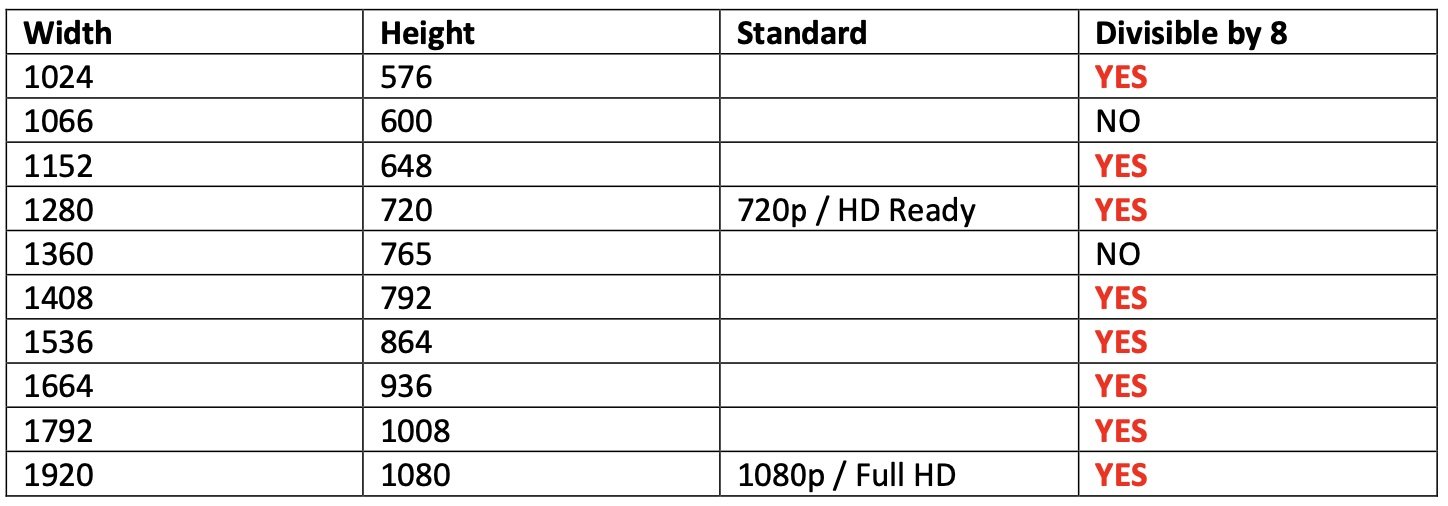
Below is a list of all true 16:9 video resolutions, including their associated standard where applicable. Also noted is when the resolution is divisible by 8. This is useful for limited video encoders. All sizes are in pixels.
Questions & Answers
This is a WIP and will be coming late 2023.
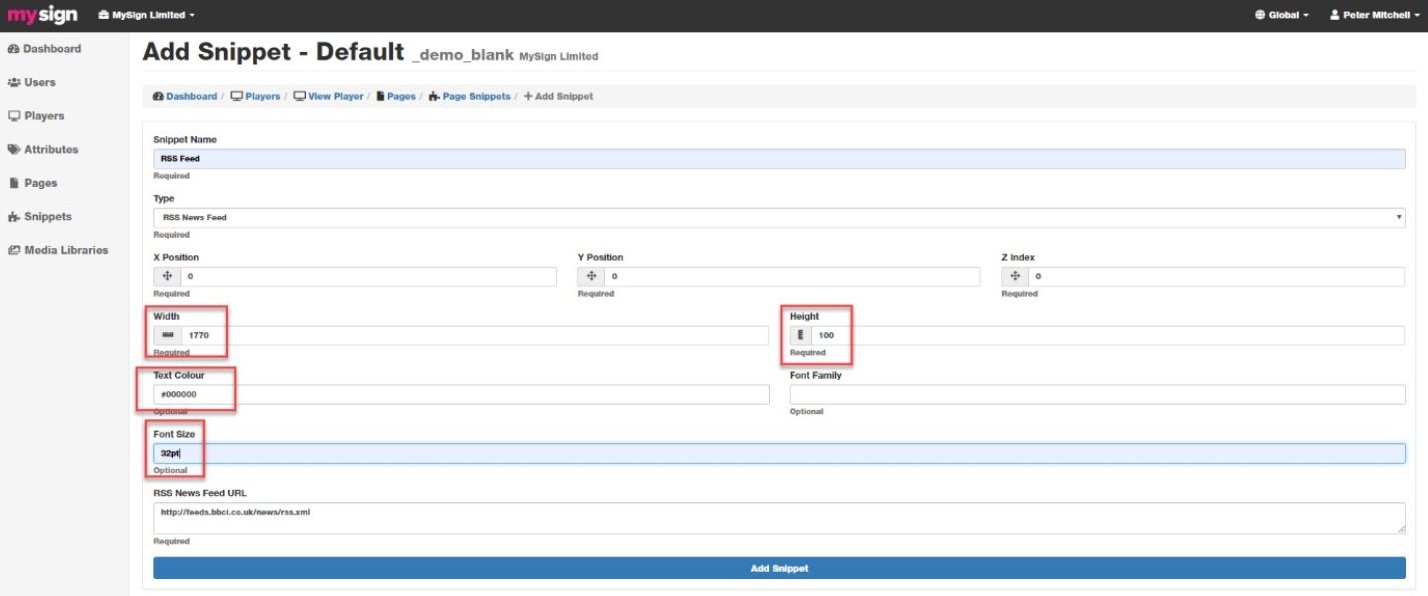
RSS Feed
Set the X and Y position and set the Width and Height. In the demo below, we have set the Width to 1770 and the Height to 100. The font has been set to 32pt as this we find to be a good size for reading and the font colour is set to black. Remember colours need to be either web safe named or use the HEX code, for example White text is #FFFFFF and Black text is #000000. By default, this uses the BBC News feed.
Text Message
Enter the X and Y dimensions and the Width and Height. By default, the time between messages is set to 10 seconds, this can be adjusted if required.
To set the styling for the Heading and the Detail, click on the drop down menu for each item and add the Font Size. A good start would be 32pt for Heading, and 26pt for Detail. Remember font colours need to be either websafe named or use the HEX code, for example White text is #FFFFFF and Black text is #000000.
Adding Text Messages
From the page snippets page select the ‘Text Library’
Here you can see the messages, edit them, select rules and add new ones.
Select the ‘Add Text’ icon.
Now simply add a Heading and the Detail then select ‘Add Text’, for scheduling see the ‘Rules and Attributes’ section.
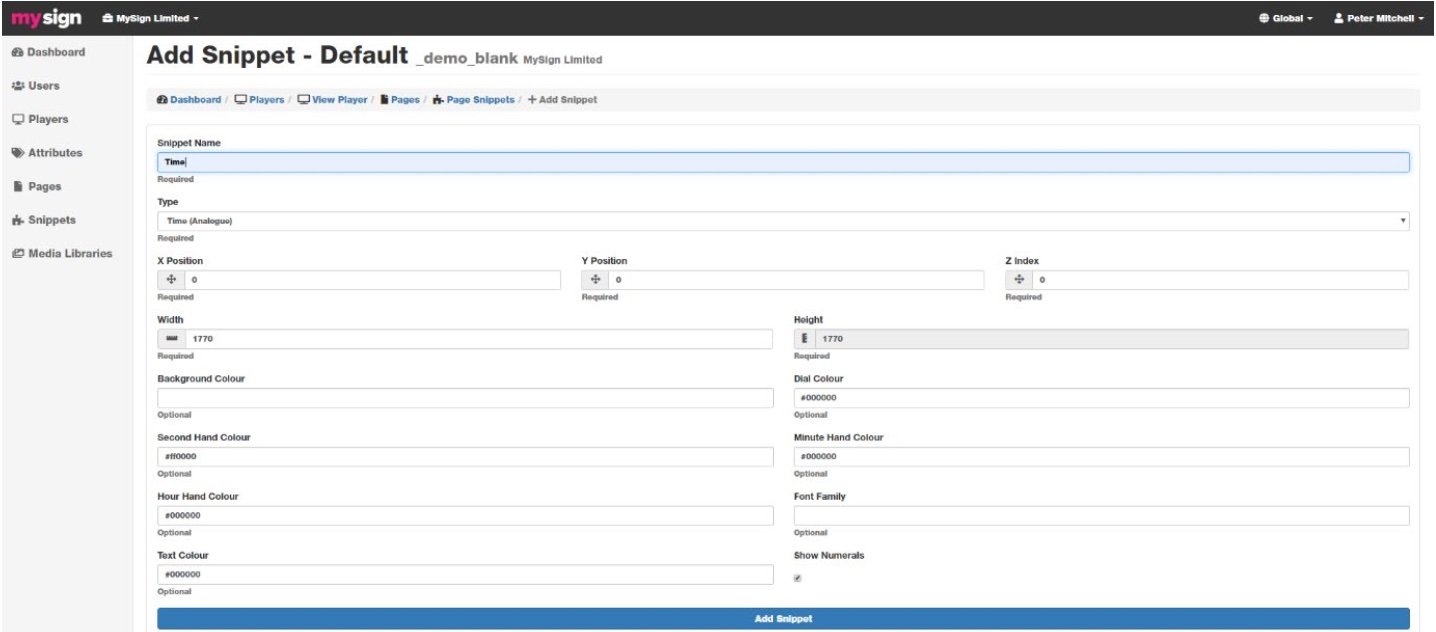
Time (Analogue)
Enter the X and Y dimensions and the Width, no need to set the Height as it will be done automatically when you enter the Width. The clock is vector based so you can make it any size you like without losing any quality. For the default clock that’s all you need to do.
You can customise the clock by adding a Background colour and change the Dial, Hour, Minute, Second and Text colours. You can also switch the Numerals on and off. Remember colours need to be either web safe named or use the HEX code, for example White text is #FFFFFF and Black text is #000000.
Time (Digital)
Enter the X and Y dimensions and the Width and Height. Select the time Format required. Select the Text Align and then set the Font Size. You can also set a different colour. Remember colours need to be either web safe named or use the HEX code, for example White text is #FFFFFF and Black text is #000000.
Enter the X and Y dimensions and the Width and Height. The weather is vector based so you can make it any size you like without losing any quality. The size of the weather snippet is set by entering a figure in the Font Size area, but you can leave this blank for the default setting to be applied. The default has an area of 300px wide by 160px high. If you change this, then adjust the width and height to suit.
To set your location you will need the Latitude and Longitude figures for your area. You can get these from https://www.latlong.net/. Enter your town then copy and paste the figures given into the snippet. Any problems then please contact support, and we will assist you in setting this up.
You can change the default Text Colour. Remember colours need to be either web safe named or use the HEX code, for example White text is #FFFFFF and Black text is #000000.
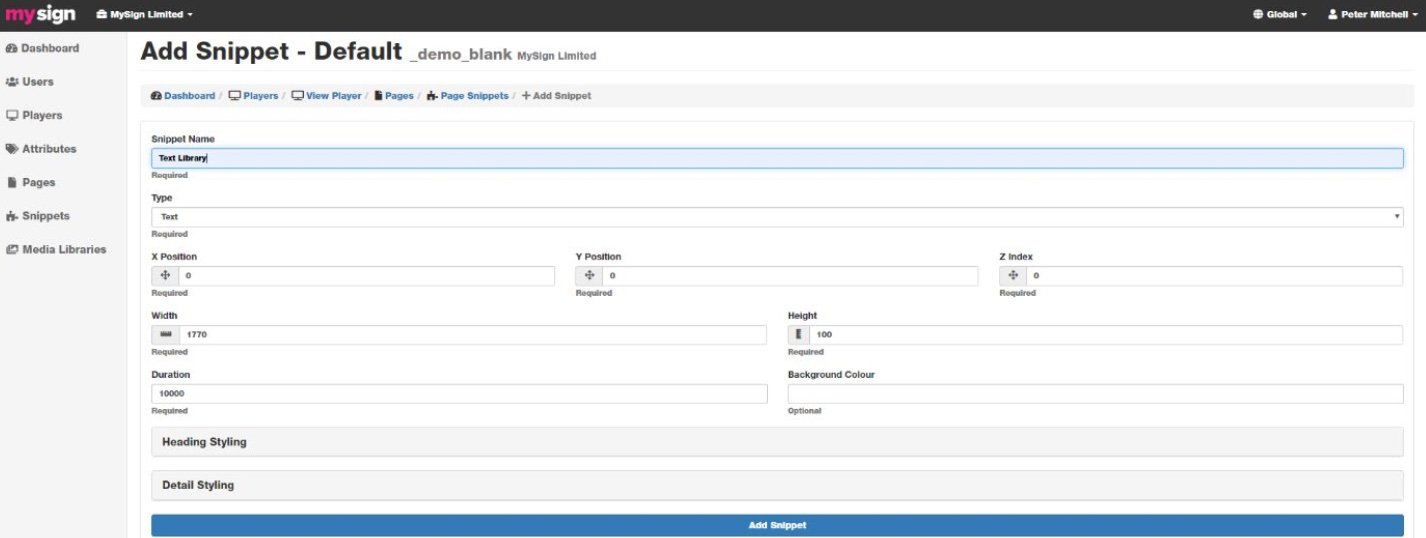
Text Library
This a more advanced version of the Text Message snippet, with this you can create a folder of text messages and add a Global Text Library as well, a great way to get simple messages across a large estate of players.
Google Calendar Integration
If you schedule events and appointments using Google Calendars and want to display them on you screen then now you can using the new Google Calendar Integration, you can select what items are displayed, when they show and when they are removed, select the font size and colour for styling and number of events to import.
Advanced Options
Global Pages
Global pages are a way to assign the exact same content to multiple players. You create a global page, add content to it, then you can assign the page to a selection of players. The content is the same, however if some media have rules – then the content would only apply to those with the matching rules. E.g. if you assign a global page to 3 players and on that page is a media library with content that has an asset assigned to it to show only on player’s 1 and 2, then the global page shows on all 3 players but the media with an asset will only show on players 1 and 2.
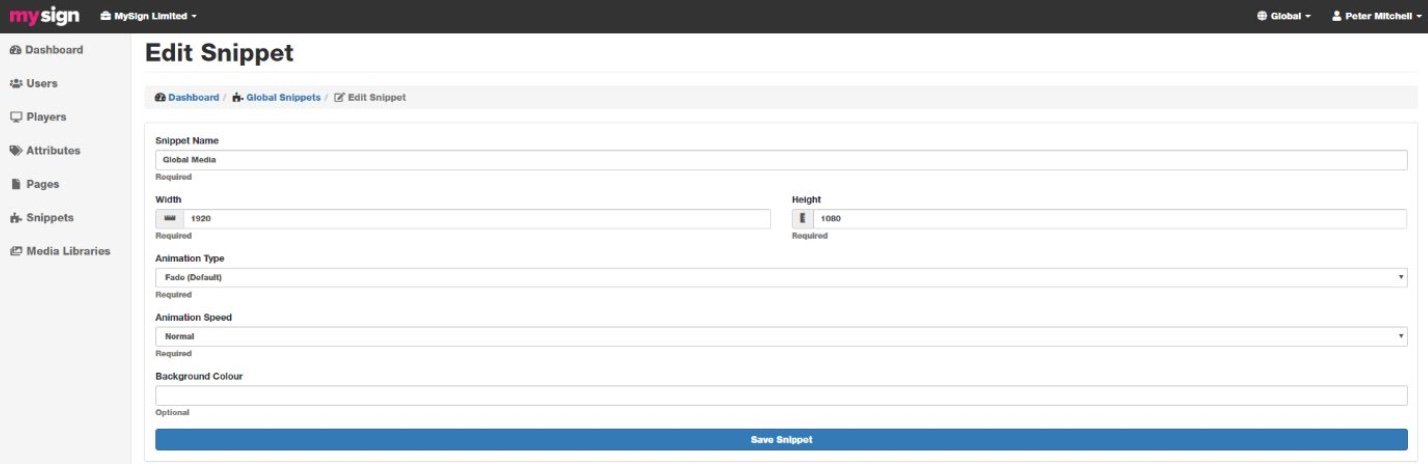
Global Snippet
This is used to create a snippet whose content can be used across multiple players and easily updated. Go to the Dashboard and click Global Snippets and then select Add Snippet.
In this example we will create a Global Snippet that is full screen but adjust the Width and Height dependant on your layout.
Once you have created a Global Snippet you need to add a media library, select Global Media.
Now select Add Media Library and Create New.
Now you have your media library you can add your own images, adjust the timing, and apply any rules as you would with a normal media library. Don’t forget to make sure images have been published before moving on.
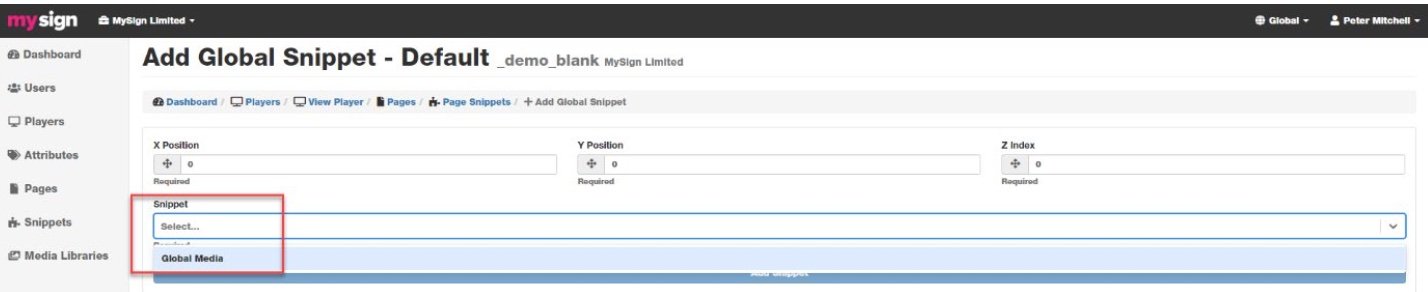
Add a Global Snippet to a Player
From the Dashboard go to your Players and select the player you want to add the Global Snippet to. Navigate to the Page Snippets and choose Add Global Snippet from the Add Snippet dropdown menu.
The global snippet we have created is full screen so you can leave the X and Y set to zero. If you have created a smaller global snippet, then add the X and Y to where you want the library to appear. From the Snippet dropdown, select Global Media which is the Global Snippet we have just created and click Add Snippet.
You can now go back to Page Snippets and you will see the Global Media snippet.
If you have a large estate of players, you can repeat this process adding the Global Snippet to each one. From the Dashboard you can now select Global Snippets and add media to the Global Media library. The content will be deployed to all sites that contain that Global Library.
Global Media Libraries
This is used to create a media library whose content can be used across multiple players and easily updated. Go to the Dashboard and click Global Media Libraries. Then select Add Media Library.
Give your library a name and then select Add Media Library. You can add your own images, adjust the timing, and apply any rules as you would with a normal media library. Don’t forget to make sure images have been published before moving on. This Global Media Library can now be added to any existing media library by navigating into the snippet and selecting Add Media Library, then Add Global Library.
Now select the Media Library and click Add Selection.
You now have 2 media libraries, one is local to that player and the other a global one.
If you have a large estate of players, you can repeat this process adding the Global Media Library to each one. From the Dashboard you can now select Global Media Libraries and add content to the Global Media library. The content will be deployed to all sites that contain that Global Library.
Media Creation
VIDEOS These can be very tricky due to the many wrappers and codecs that each format will use. The bitrate makes a huge difference regarding file sizes for uploading to our server and then downloading to your players. Please make sure you understand this before trying to upload video files and so save on any problems regards downloading and playing the files.
Here are some guidelines for you. The system supports MP4 and WebM but we would recommend using WebM as MP4 can use many codecs and is just a wrapper whereas WebM is native to Chrome.
Recommended WebM settings Video Birate: 2,000 Codec: x264 Maximum size would be 1920 x 1080 for full screen landscape and 1080 x 1920 for full screen portrait.
Typical file size should be about 16 megabytes per minute of video.
If you want to use MP4 then make a short test video, upload and wait for the player to update. If everything looks OK then make a note of the settings and use them for all future videos.